Wednesday, 26 December 2018

Merry Christmas


Hope everyone is having exactly the kind of Christmas they need.
Merry Christmas one and all.

Cxx
Wednesday, 19 December 2018

Winter themed ATC coins


I made this trio of ATC coins for a swap which had a winter theme...and I made the little holder out of double sided patterned paper to keep them in place in the envelope while in transit.

The left hand one I used a resist wax with distress oxides for the sky and texture paste with ultra fine glitter for the snow.

The centre coin was made with acrylic paints that included a little shimmer in the sky and the snow had a little glitter added while the paint was wet.

The right hand side coin again had resist and oxides for the sky with white acrylic snow. The snowman was stamped onto card, fussy cut and adhered to the coin.

The stamping on each coin was using black archival ink

I really liked how they came out and I made quite a few of these in a similar style and the extras will be abandoned throughout the winter months as part of the art abandonment movement.

Until next time
Cxx

Friday, 14 December 2018

December square


December rounds out the year of swapping monthly decorated 4x4 squares and I chose to end with this snowy scene. I used a mix of blue distress oxides and white acrylic paint for the background and black archival for the stamping. The snowmen were fussy cut and adhered to the completed background. I am pretty pleased with how this one turned out.
Until next time
Cxx

Sunday, 2 December 2018

November square


Just realised that it has been a full month since I posted anything here. We were hit by a particularly nasty virus which is still hanging around weeks later... But I cannot knowingly neglect this for too long so here is the 4x4 square I made for my November swap partner.

Until next time
Cxx

Thursday, 1 November 2018

Home Sweet Home


These are samples from the Thursday art group at the Hospice. They are 7x4 inch hangers made with paper, punches and stamps and were great fun to make. Participants added lots of personalised features on their individual hangers, some relating to homes they grew up, other to homes they might like to live in. Lots of discussion went on while they worked and it was interesting to hear people's experiences. At the end of the session everyone had a completed hanger to be proud of.

Until next time
Cxx

Tuesday, 23 October 2018

October square


This is my 4x4 inch decorated square for October...as part of a year long swap at UK Stampers. When I think of October, Halloween immediately springs to mind as the most obvious theme...and I went with that!  I used a piece of embossed card from another project for my base (matted onto thick purple card) and two retired Stampin' Up! sets. The cobwebs and blood are from Ghoulish Grunge and the spider, bat and monsters are from Googly Ghouls. I like that it is cute and spooky rather than scary spooky and I hope my swap partner will like it.

Until next time
Cxx


Saturday, 20 October 2018

Spooky...tag swap


This tag was made for a regular monthly swap on UK Stampers and since it is October, my tag was inspired by Halloween.

I used a Kraft base and four shades of distress oxides (two purple shades, one orange and black) and stamps from Ghoulish Grunge and Google Ghouls - both retired  sets by Stampin' Up! I used thick black bakers twine as my tie and split the ends to form spidery tails and that was it. A quick and fun project.

Until next time
Cxx

Wednesday, 17 October 2018

Autumn Trees


 These are a couple of trees used as samples for the Thursday art class at the hospice. These are done using acrylic paints -the sky and grass were applied as a wash. The trunk was built up as the project developed and the leaves were made using acrylic paints applied with a small bunch of tied cotton buds, dipped into the paint and then onto the paper, building up a nice range of autumnal colours and giving some texture and depth to the leaves. I also went back in with some undiluted green acrylic and a brush to add some texture to the grass before adding falling and fallen leaves and finally the wording stamp was added in archival ink.


This second tree has more of a water colour feel to it as the paint used was a different brand and far more dilute than my usual paint. It was also a sample I was using to show the various steps throughout the class and so it was done in a real hurry...which may not have been a bad thing as it definitely did not allow any time to over think the process.

Of the two I prefer the grass on the first one - it has more texture and depth and I definitely prefer the tree trunk of the second one..it is softer and looks more real to me


Anyhow these were the project for Thursday and everyone had great fun doing them. We did have a couple of mini forests and even one burning bush (rather than a tree) but we balanced it out with another bush and some wording and the end result was great. We mounted the finished artwork on some card and the patients took their masterpieces home with them.  If you haven't already tried it,
I highly recommend painting by cotton buds...its  very effective, and more importantly, its fun!

Until next time
Cxx

Tuesday, 9 October 2018

Be your Beautiful Self (AJP)


Today I'd like to share an art journal page I made in response to a prompt from Nina Ribena which was "texture and white space" I had a lot of fun with this...

I started with a thickish layer of  white gesso, roughly applied (I did not want a neat smooth surface). Once that was dry, I used  black archival ink with a selection of stamps from VLVS. Then I added some watered down DecoArt media acrylics.  I didn't like how bright some of the colours were so spritzed them again and let them run down the page, but then realised that there were pretty much no white spaces left, so I added in some titanium white with my fingers before adding texture paste through a script stencil.

While this was drying I gathered my bit and bobs...some burlap trim which I split at the ends, a doily which I treated with distress oxides (old paper, tea dye and soot) the face and wings which I made early in the week out of paper clay and moulds (love this stuff) , a frame from a set I picked up in the pound shop last month and a butterfly which was stamped and fussy cut....and then adhered them all with gel medium. I went round the edges of the whole page with distress soot ink and finally added the small talk wording (by Tim Holtz) to complete the page.

I really enjoyed making this...once I got past the gesso stage, I got lost in the process and that felt so good.

Until next time
Cxx

Friday, 5 October 2018

Tag swap


I made this for a monthly tag swap over at UK Stampers. I used velvet card as my base for this one and added a couple of shades of distress oxides (old paper and tea dye) before adding stamps. I started with the scientific background  and then over the top I stamped the  line through the middle three times with three different shades of ink (both stamps from Visible Image) and finally I added the entomology specimens stamps. A punched hole some thick twine and a punched out heart completed the tag. I had no idea where this was going when I started out, but I am really pleased with how it turned out

Until next time
Cxx

Saturday, 29 September 2018

I'm wearing this again....


Today I am sharing this card I sent to my swap buddy Suzanne - I wondered if she might find it a bit too "busy" (some people prefer plainer designs) but she absolutely loved it!

The background was a gelli print using a selection of acrylic paints, assorted dotty stamps and a ton of different sized bubble wrap. I cut it to size, inked around the edge with black archival and used a white uniball signo pen to add extra detail. The cat lady is a Ranger Dylusions stamp (cat & dog) and the wording is from the small talk "snarky" collection which I fell in love with the moment I saw it.

Suzanne says she plans to frame this, and what better compliment than that? I am so pleased.

Until next time
C xx

Thursday, 20 September 2018

Mini art at St Joe's


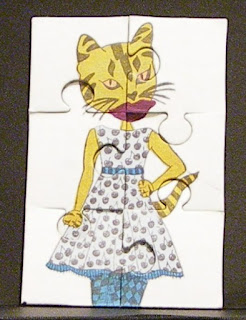
                                                                                                                                                                                                                                             I facilitate and art and crafts session once a week  with patients who attend day hospice at our local Hospice...and this was a recent art project we did using stamps and markers. The one above was framed....but some of the patients opted to had their mini works of art turned into mini jigsaws, like the on the left.
The one of the right was a painted background with stamped silhouette image which was framed
We used a variety of images and styles and got a nice selection of finished pieces and everyone had their own piece of mini art to take home at the end of the day.
Until next time
Cxx

Tuesday, 11 September 2018

Colourful 60th Birthday card


I was asked to make a bright and cheery card for a man who celebrated his 60th birthday recently. I don't actually know the recipient so kept it fairly simple, but I am told it went down a treat, so job done!

Until next time
Cxx

Tuesday, 4 September 2018

Autumn is...


This was made as my September offering for the  year-long decorated square swap I am taking part in. We are a group of twelve stampers and at the end of the year we will have swapped one square per month ... and these can be used to make a calendar for following years.

I really liked the card I made for Suzanne last month, and so decided to do something similar, on a smaller scale,  for this swap.

The background was a blend of ripe persimmon and mustard seed distress oxide inks and the stamping was done using sepia archival ink. On all of my previous monthly swaps I have included the month...but since this one has text relating to autumn I am tempted to leave it off.  I may still change my mind, but for now I am calling this done. The recipient can always add the month if they want to.

Until next time
Cxx

Saturday, 1 September 2018

Be you... Bravely (arch)

 I still had a few of the Gothic Arch bases prepped and on my desk so I thought why not....This one was a loose interpretation of a "Fashion" theme. This gal was in among my Tim Holtz paper dolls and to be honest I wasn't sure quite when I might use her, so this seemed like the perfect time.

The base is cut from a cardboard box, primed with gesso and painted with decoart acrylics. I used a couple of VLVS stamps for the background, added the trimmed edge of a doily from another project and my paper doll. I inked around the edge of the arch with black archival ink and used a white signo pen to add dotty highlights...and done.

I am actually quite pleased with how it turned out...not so thrilled at the quality of the photo though and need to look into why that happened this time...could be about  angles perhaps?

Anyhow until next time
Cxx

Tuesday, 28 August 2018

Be Brave... Adventure awaits you (Bunting swap)


I am taking part in a six month long bunting swap on UK Stampers and this is month one. I will admit I hadn't realised each month was going to be a different theme and I've yet to reconcile myself with how this will look should I decide to string them all together at the end of the six month swap...but more importantly for me, I hadn't spotted the themed aspect and I really hate themes. While I appreciate that many people find working to a theme helpful, for some reason when I am faced with a theme, all creativity vanishes and I am totally bereft of ideas...

But sign up for this I did and so here we are... the first theme was travel so I thought maps.... so I made my base bunting from an old card board box that some A4 card came in and I covered that with map paper and topped with three shades of distress oxides. I over-stamped the whole thing with a paper artsy script stamp (not really visible in the rather horrible photo) using tumbled glass distress oxide. The main image was stamped onto linen paper using black archival ink, cut out and adhered  and sealed using mat gel medium. I added some Tim Holtz  tiny words stickers for the wording Be Brave... Adventure awaits you...  Some charcoal pencil, black inktense pen, wink of Stella and silver uniball were used for highlights and it was finished. This piece is going to Germany and I hope my swap partner will like it.

Until next time
Cxx

Thursday, 23 August 2018

Anniversary card


I made this card for my brother and his wife for their wedding anniversary today. I used white linen card panel and using a stencil, inked the circle with distress oxide inks. The birds were stamped in black archival ink onto a separate piece of linen card, fussy cut, coloured and adhered to the card front. The hearts were punched and fixed with glue dots. The anniversary greeting was stamped and  the linen panel was matted onto silver before being affixed to the card front....and job done!

 Even though the birds are rather budgie like, I hope they will get the love birds reference and wont be scratching their heads and wondering why I put budgies on their card 😀

Until next time
Cxx

Friday, 17 August 2018

Every leaf....


I have more recently  been kiboshed by a particularly nasty summer lurgy that came suddenly and refused to budge, hence the long absence...but  some weeks later I am beginning to feel human again (Thank  goodness) and today was the first day I managed to spend some creative time... and so I made this card for my swap buddy Suzanne.

While I was battling lurgy the latest release of distress oxides landed here and while I knew they were here, I didn't have any oomph to even open them - but I am going to make  up for that now.

This card was a plain white base into which I blended  oxides ripe persimmon  and mustard seed. I over-stamped this with  a paper artsy script stamp using old paper oxide which provided a subtle layer. Then I added the leaves  and hedgehog in sepia archival ink  over the top and coloured the leaf pile with distress markers.

 Leaves, hedgehog and sentiment were all from a magazine "freebie" that my husband picked up for me while I was bed-bound (bless him) and I quite enjoyed working with them and as they are versatile I will get a lot of use out of these.

Once everything was done and dry I matted the panel onto some Kraft card and then onto a thick white card base. It will go in the mail tomorrow and I hope Suzanne will like it.

Until next time
Cxx

Friday, 13 July 2018

Summer fun at St Joe's


So once I week I volunteer at our local hospice (St Joseph's) as part of the Arts Programme there. I work with patients in the Day Hospice and for the past few weeks we have been busy making things for the big summer FUNd raiser... which is tomorrow.

So we made some giant flowers ...over a foot wide and very bright and colourful


Over thirty layered paper flowers of assorted sizes


We also made  a whole swarm of butterflies; over one hundred hand decorated beauties  ranging in size from 6 inches to one inch. 


These are going on the wall to show the way out to the garden. It should be beautiful.

 Tuesday and Wednesday Art Groups  at the Day Hospice  also made banners and giant fruit decorations. It should be an amazing  summery display and the FUNdraising team are busy putting everything out today. 

The patients and other volunteers had great fun undertaking these projects over the past few weeks. We have a recycled mosaic project coming up ion the near future...so watch this space 😉

Until next time
Cxx


Tuesday, 3 July 2018

Happy Birthday ... a blast from the past


This pretty simple card was made using elements from a card making kit I bought when I first starting making cards...many years ago. I stumbled across it when I was looking for something else and decided it really was about time to put it to good use.  

I teamed it with some patterned paper I have in my stacks and added ink edging and a coordinating sentiment panel to pull it all together and complete the very simple design.

This is part of my use it or... policy and I intend to be brutal  as part of my clear up/clear out craftroom project.

Until next time
Cxx

Monday, 25 June 2018

Be Amazed... a tag


Decided to try something different ( for me) and made this very simple tag using modelling paste through a stencil  and then added acrylic paint and spritzed it to allow the colours to run where they will. Once dry I added wink of Stella to the flower petals and some grey splatters. It's no masterpiece, but I was quite pleased with how it came out.
Until next time
Cxx

Friday, 22 June 2018

Go Wild....


Made this birthday card for my nature loving brother in law using stamps that came "free" with a magazine (inflated mag price to cover the stamps of course so not really free but I love these stamps and so it was worth it.)
The giraffe was stamped onto white textured paper and coloured with promarkers before being adhered to the card front. The silhouette and sentiments were stamped using archival black ink.
I am happy with how this came out and I am pretty sure he is going to love it. Happy Birthday Charlie!
Until next time
Cxx

Tuesday, 12 June 2018

Painted Silence


This was the card I sent to my regular card swap buddy this month. I used a brick embossing folder for the base and a Gothic arch template for the feature panel. I covered the arch in gesso and then added layers of paint in shades of yellow and lime. This was topped with random script stamping and I aged the edges of the arch before adding the butterfly and sentiment. 

I really like the peacefulness of this one and hope Suzanne will like it too. It is on its way to her as I type and she is sure to let me know once it arrives.
Until next time
Cxx

Friday, 8 June 2018

MoM mask on a stick


Can't believe it is a whole week since I arrived in Coventry for the MoM weekender... 

At each MoM event there is a fun theme for the  Friday night meet & greet.  and this time it was decorated masks. 
As someone who wears glasses, and knowing how hot it can be in the hotel bar, this was my make. I  know this style of mask probably has  a fancy name but it escapes me for now, so I decided to go with mask on a stick 😁. 
I had great fun cutting and shaping the mask, layering up the components as I went... and not bothering to leave eye holes was not a problem at all with the stick. I  was so glad I opted for this style and I ended up using the mask as a fan as the room heated up beyond my personal endurance. Double-duty mask on a stick...not bad eh?

Until next time
Cxx

Thursday, 7 June 2018

A little summer Mixology


I just spent the most amazing weekend in Coventry at the Ministry of Mixology June 2018 event. The last session ended at 4.15pm on Sunday and its now Thursday  and I am still picking paint from my nails 😊

This pic is my take on the lovely  Hannah Oxberry's mini-book evening M&T workshop.  It was the late session on Saturday night and I didn't want to rush it so I brought it home to add the final bits and bobs. Too often I have brought stuff home intending to finish it only to leave it languishing for ages... but last night I spotted this and I got her done!  I love it!

Still buzzing from MoM and will share more soon but for now its bye from me ... until next time
Cxx

Tuesday, 29 May 2018

A little bit punny....Artist Trading Coins


Having a little more fun with the Artist Trading Coins - this time using a set that came free with a magazine recently.

I wasn't going to buy it initially, but then started to see some fabulous makes using it so made a quick dash to the local supermarket...and I'm glad I did.
These two ATC were made using two of the images and coordinating sentiments.... they never fail to make me smile.

I used double layers of Kraft card for the bases, some coloured background paper with a little light dotty stamping (which does not show up well on these pics for some reason???)  and some ink edging before adding the punny stuff.

I was happy with how they turned out. I haven't swapped any of these new style ATC as yet. I know there are some swaps coming up soon, but I thought I may also abandon a few (as part of the Art Abandonment movement) and hopefully share a smile in doing that.

Until next time
C xx

Tuesday, 22 May 2018

Brick arch


 Another Gothic Arch project...Lots of texture on this one using a Viva stone paste through a brick stencil and adding the clean up paste randomly across the arch before using inks and sprays. As with the first one,  I added a second detail layer at the top of the arch and used Tim Holtz paper dolls  to finish it off.  Its very simple but I really like this one.

Until next time,
Cxx


Saturday, 19 May 2018

"Toxic - its all perspective" (a tag)


Another tag this time. This was a ready made tag base which I covered with gesso and then added stamps and sprays (on both sides.)

For the front I used a selection of stamps from VLVS and  for the reverse I used  a  stamp from the FRAGILE set by Visible Image and a Tim Holtz words sticker to finish it off.

This tag went to Germany as part of an International swap.

Until next time
Cxx


Friday, 11 May 2018

Artist Trading Coins


Perusing t'interweb tonight I stumbled across "Artist Trading Coins" - a new one on me. Apparently it is a type of ATC but coin shaped, sturdy and two and half inches in diameter. 

I just had to try for myself and I think I have a new addiction 😍 


I had such fun making these and I am pretty sure I will make loads more in the coming weeks. I was so keen to share them I didn't even bother to take them to my photo station...I just snapped them right there on my messy desk.

Until next time
Cxx

Monday, 7 May 2018

Mark Maker - a Tag


This is a tag made for a regular swap on UK Stampers. I used a gelli print base and added a variety of stamps from VLVS...including the "ratman" who was stamped on white linen card, coloured, fussy cut and adhered to the tag with gel medium.

I had no idea what I was going to make when I started out but I am very pleased how this one evolved and I am happy with the end result...Now I need to punch a hole and add some twine and its good to go.

Until next time
Cxx

Friday, 4 May 2018

"Time" - A Gothic Arch


I take part in a number of swaps and random challenges across web based groups and this was made for a Time themed Gothic Arch challenge. A downloadable template was provided for the basic arch shape and that was what I used to base my project on. I have since found several other downloadable Gothic Arch templates of varying designs. I decided it made sense to prep a few of these at the same time so it is highly likely I will be sharing more of these in future.

For this particular project I used a mix of three shades of blue acrylic paints, an assortment of stamps and archival ink. The boy sitting on the clock hand (katzelkraft stamp)  is from a Tim Holtz paper dolls pack.

I added an extra piece which I cut from scraps using the template as a guide. This was my first every try at something like this and it was fun.

Until next time
Cxx

Tuesday, 1 May 2018

Happy Birthday


I have two brothers...with birthdays just two days apart and so I made this card, using a selection of Tim Holtz stamps and distress inks, for the brother who lives in New Zealand and I am hoping the Brit theme will raise a smile. Due to unreliable international postage times I always have to make his card in early April, to be sure of getting it there in time, but I was quite pleased how this came out.

My other brother lives 40 miles away and his card is still in progress, but at least I can post that off a couple of days before his birthday.

Until next time
Cxx

Thursday, 26 April 2018

We are fearless....


This was my April  card for my regular swap buddy Suzanne. I used a gelli plate print for the background and added stamped and  coloured quirky birds and a sentiment to complete this cheery little card...which  I know Suzanne loved because she sent me a really lovely message. It is so nice to get positive feedback on something "made with love."

Until next time
Cxx

Monday, 23 April 2018

The wonderful world of MoM

I recently spent a fabulous weekend away at the April Ministry of Mixology event in Coventry... Hours and hours of fun and creativity with two full day and one mini workshop, resulting in three completed projects...

This project was from the mini workshop  on the Saturday night with the lovely Brenda Brown. It was a ton of messy fun making this and Brenda was amazing.

Not 100% sure how I am going to display this as yet but I love it

Until next time
Cxx

Monday, 9 April 2018

Be sure to wear flowers in your hair...


After a break from crafting while we celebrated my husband's milestone birthday in Las Vegas, I was eager to get back in to the craft room and start "making stuff again"....and this was made for an art swap, where  we could make anything at all with the loose theme of "floral". 

Aside from the flowers, which were stamped onto a distress oxides background and punched before being "dressed" with gel pen, perfect pearls and a wink of Stella, the rest was done with pens, using light but deliberate (unblended)strokes.

The finished page was mounted on a coordinating blue card base and sent off to my swap partner.

I  had no idea what I was going to do when I sat facing the blank page, but was quite pleased with how this came out in the end.

Until next time,
Cxx

Tuesday, 3 April 2018

Officially Old


This is one a set of cards I made for my husband's recent milestone birthday and as he is now officially old , I  made this funny card using distress oxides for the background (two shades for the sky and four shades for the earth)  I die cut some prehistoric creatures in black and added the sentiments in black also.

He has a great sense of humour and loves funny cards so this made him smile

Until next time
Cxx

Tuesday, 13 March 2018

Recycled Heart


This was a fun project I made for an art group swap. The theme was Hearts and the only stipulation was that it had to be made using recycled materials... which makes my inner pack rat sing (and my husband sigh with relief that some of the "junk" I refuse to throw out was actually getting used 😁)

I started with a squished lid from a box some A4 paper and card came in and from this I drew and cut out some hearts (I used the others in other projects, it seemed to make sense to deal with that lid and get rid of the waste in one go).  They were gessoed and painted both sides (it helps with base rigidity, prevents curling and  of course looks better if the back of the project can be seen) and then stamped with a crackle stamp (Andy Skinner Toxic set), inked and finished with  white gold Alchemy wax.

For the base I used one of the flaps from a heavy duty box adhesive supplies had been delivered in and I distressed the cardboard. The box was way stronger than I expected and this was hard work and messy... but so worth it. Once it was done to my satisfaction I  added a layer of gesso and allowed to dry. Next I added some texture paste using two different script stencils. Once that was dry I used a paper artsy mini script stamp and randomly stamped the base. Then I used the white gold Alchemy wax again around the edges and  to add some highlights.

I stamped the FRAGILE wording (also from Toxic set) and printed the quote wording and ink edged them both before adhering them to the project. I wrapped some metallic thread around the heart and then used heavy body gel to adhere the heart to the back panel.

A couple of holes punched with the cropodile and threaded with some left over twine ribbon finished the piece and it was sent off to my swap partner.

I had such fun with this and it was good to see how something that was due to go in the recycle bin could be transformed with a little time and some painty stuff.

Until next time
Cxx

Wednesday, 7 March 2018

Courage is...


This card I made for my regular swap buddy Suzanne. I used a selection of distress oxides for the blended background which I then lightly spritzed with water.  I used a selection of Tim Holtz stamps (that I uncovered - new in their packets - during the big tidy which began in December and is still ongoing as it proved to me a much bigger job than anticipated) to build up the design and I am really happy with the way it turned out. I hope Suzanne will love it too.

Until next time
Cxx

Friday, 2 March 2018

Happy Birthday Sister


 I bought a magazine in the supermarket a few weeks ago and the "free gift" was an embossing folder, stamps and dies. I have been known to buy these and set the freebie aside only to discover it years later, still in its wrapper...so this time I decided I would try it out straight away.

I really like the embossed image, which I lightly dusted with ink. I  die cut the flower and the butterfly in two shades of pink and matched one shade to the mat for my card base panel. I didn't use the stamps that came in the freebie on this card for my sister in law's birthday , but I will absolutely use them on other cards. I used some perfect pearl accents to complete this card which the birthday girl loved.

Until next time
Cxx

Tuesday, 20 February 2018

One of a kind Love


This was an ATC I made for a swap on the Mixed Up Mag Mixer group where the February theme was of course Love ...there's just no getting away from it at this time of year eh?  😍

I used an MDF blank base to which I applied black acrylic paint, added weathered wood and when that was dry, topped with a dark red acrylic. I love weathered wood more than plain crackle because it allows you to use two shades and have one show through the other when the cracks appear.

For the heart (again MDF) I added red acrylic paint and then stamped with black archival. I ink edged all the way around and then added a little metallic wax to finish it off.

The wings were stamped and heat embossed onto a speciality paper and then cut by hand and adhered behind the heart. The one of a kind  wording was stamped, cut and adhered top centre and the word love  at the bottom was a chipboard piece which I dipped into versamark and covered with metallic embossing powder and heated.

When all was dry and stuck down firmly, I added a little metallic wax around the edges and called it done. I quite liked the end result and hope that by swap partner will too.

Until next time
Cxx

Mysterious (AJP)

Back to basics with this simple art journal page offering. A mop up page, some finger painting, stamps and mark making added and I was pl...